Patient Flow is designed to help you track your patients through your operatories and allows seamless communication with your team throughout the practice. For optimal performance, Patient Flow should be used in the desktop app, as custom pop-up notifications are not supported in internet browsers.
This guide covers the important icons and functionalities within Patient Flow to help you navigate as patients move through each step. To get started, you can open Patient Flow by selecting the Operations button at the bottom left of any page in PbN or by selecting its icon on the left of the desktop app.

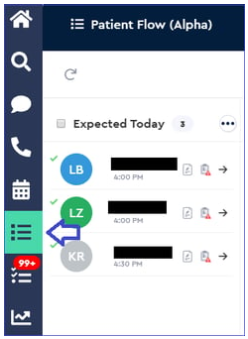
Expected Today, Late, and Checked-in
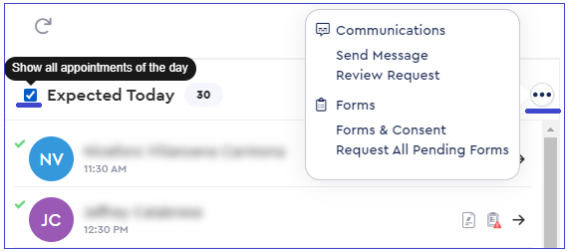
The first step in tracking patients is the Expected Today section. From here, patients will move to either Late or Checked-in. By default, it displays patients scheduled within the next hour, but you can check a box to show all appointments for the day.
Options for Each Section
For Expected Today, Late, and Checked-in, you have the following options:
- Message Everyone: Click the three dots on the right to send a message to all patients listed in that section.
- Routing Slip: The routing slip icon provides access to the patient’s routing slip. If changes have been saved, a red icon will indicate so. Mousing over the icon will preview the changes made without having to open it fully.
- Forms: The forms icon allows you to send online forms to patients and see what forms they need to complete. A red indicator on this icon means the patient has pending forms. Mousing over the icon will give a quick list of pending forms, and selecting it will pull up a menu to send the forms to the patient.
- Arrow Icon: The arrow icon is used to move patients to the next step in patient flow. If they are in Expected Today or Late, they will be moved to Checked-in when selected. If using the Patient Kiosk, once a patient hits check-in on the tablet, they will automatically move to the Checked-in section in patient flow.


Operatories
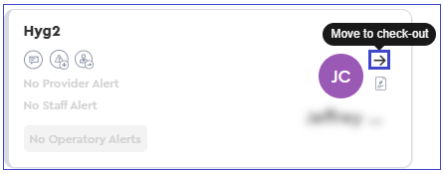
Once a patient is moved into an operatory, you still have access to the routing slip and some additional options:
- Action Icons on the Left:
- Send a Team Message: Use this icon to send a message to the team about the patient or operatory.
- Select an Operatory Alert: Choose from a list of pre-defined alerts to notify the team of specific issues or needs within the operatory.
- Summon a Provider/Staff Member: Use this icon to summon a provider or staff member to the operatory.

Once the appointment is completed, move the patient to checkout by selecting the arrow on the right.
Check Out & Completed
Patients in Ready for Check-out will automatically move to Completed when the appointment is marked as completed in your practice management system. Similar to other steps, you will still find the patient's routing slip to the right of their name in both these sections.

Other Important Icons
Throughout Patient Flow, you will find other useful icons and options:
- Top of the Page: This section includes a refresh button, date selection, team message, and settings.
- Refresh Button: Manually refresh the patient flow page to ensure the latest information is displayed.
- Date Selection: Choose a specific date to view patient flow data for that day.
- Team Message: Send a message to the entire team.
- Settings: Access various settings to customize the Patient Flow feature.

At any point, you can also click on the patient's name for additional options such as messaging, alerts, and forms and moving them forward or back a step in patient flow.

Patient Flow Settings
The Patient Flow Settings section allows you to customize various aspects of the patient flow system.
Overall Settings
- Location Selection: Select the current location where the patient flow system is being used.
- Manage Default Settings: Customize default settings for operatories and other features.

Service History
- Service List: Track services such as oral evaluations, comprehensive oral evaluations, and X-rays.
- Manage Services: Add, edit, or remove services from the list.

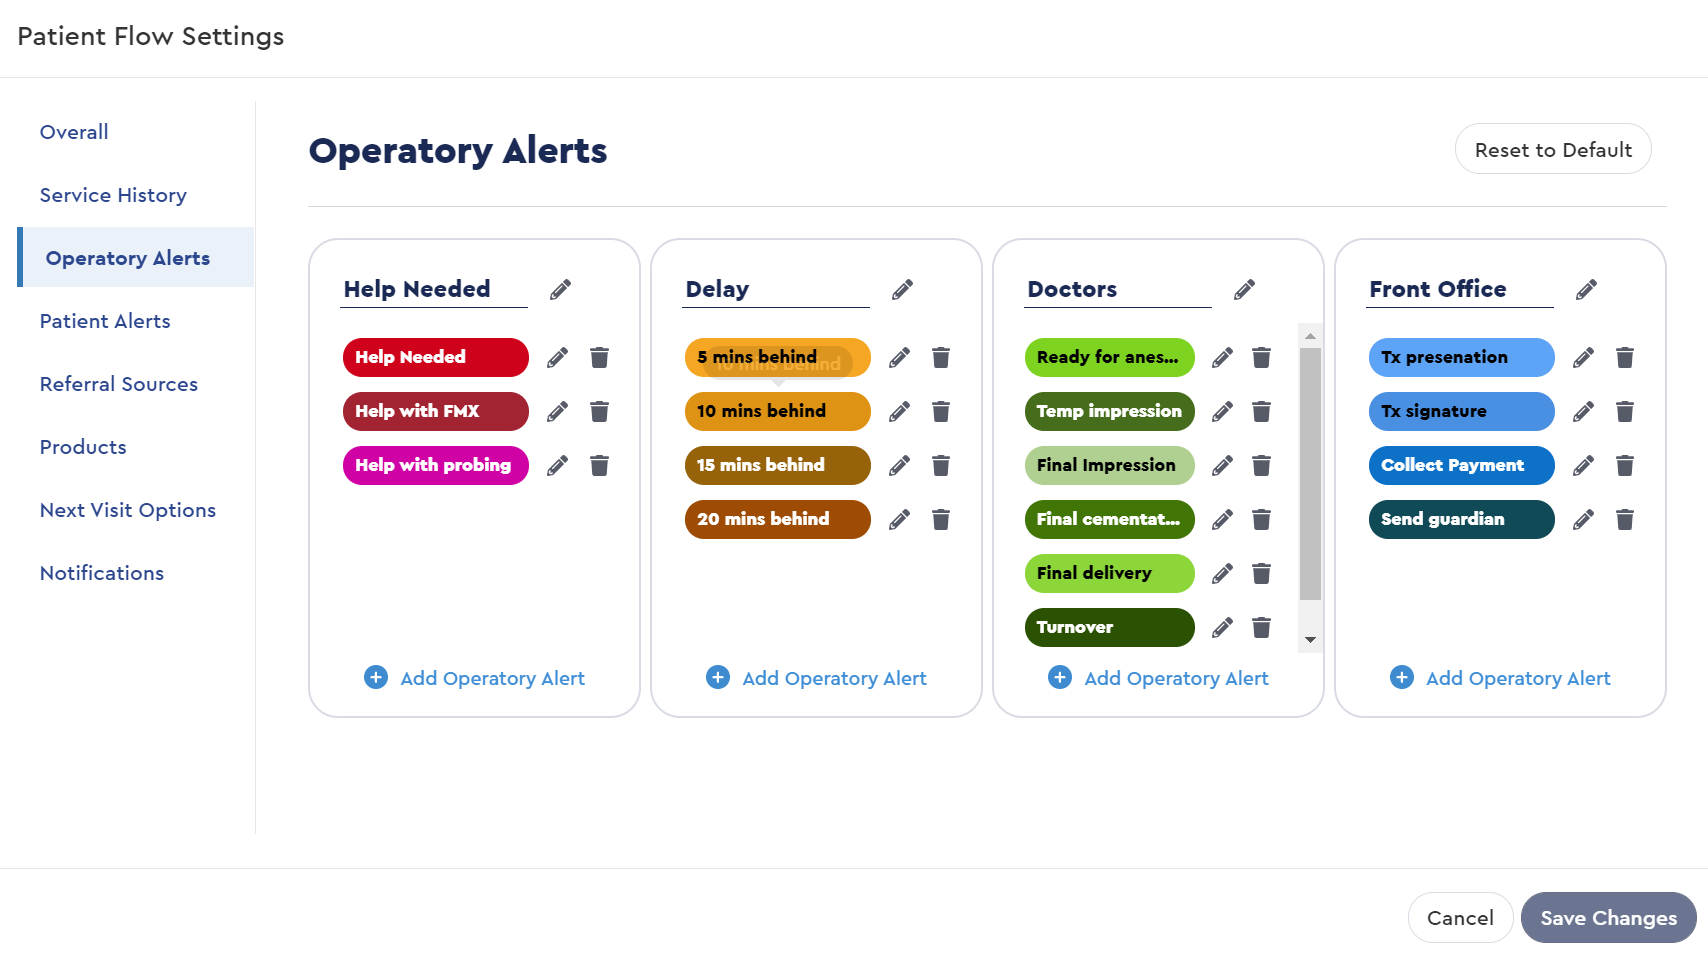
Operatory Alerts
- Customize Alerts: Set up and manage alerts for different scenarios within the operatory.
- Help Needed: Alerts when assistance is required.
- Delay Alerts: Notifications for delays, such as being 5, 10, 15, or 20 minutes behind schedule.
- Doctor and Front Office Alerts: These are specific alerts for doctors and front office tasks, such as final impressions or payment collection.
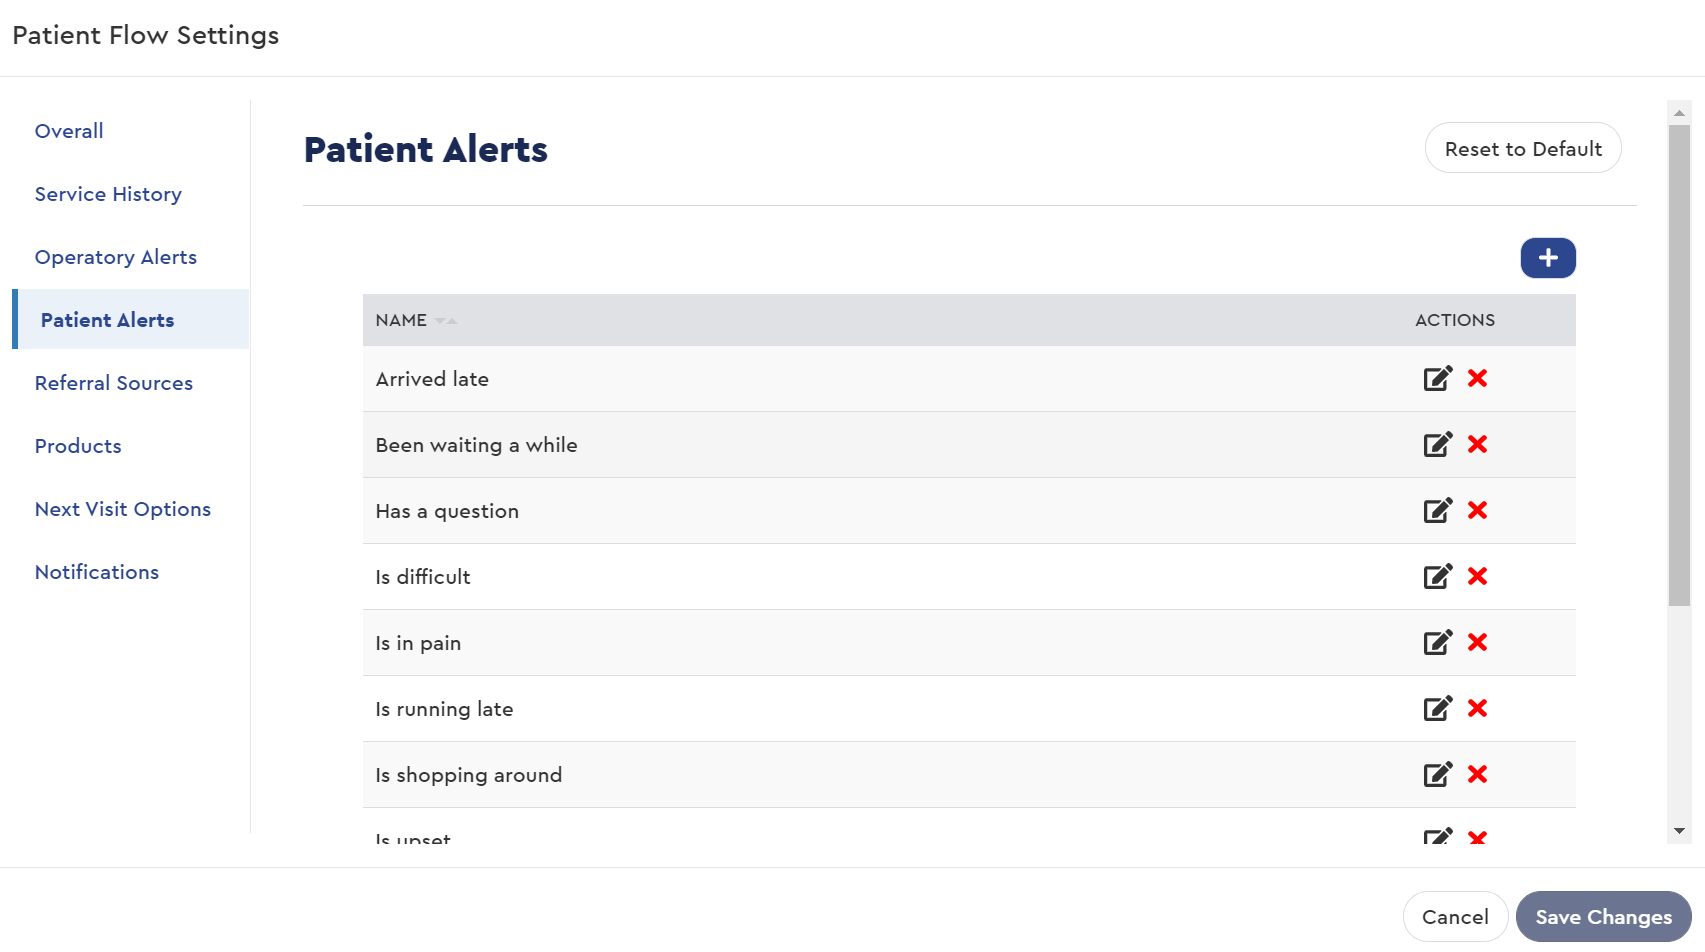
Patient Alerts
- Manage Alerts: Customize alerts related to patient-specific issues.
- Alert List: A list of possible patient alerts, such as "arrived late," "in pain," or "has a question."
- Add/Edit/Remove Alerts: Modify the list of patient alerts as needed.
Referral Sources
- Manage Referral Sources: Track and manage patient referrals.
- Referral Source List: A list of referral sources that can be tracked.
- Add/Edit/Remove Referral Sources: Modify the list of referral sources as needed.

Products
- Manage Products: Track products available for patients.
- Product List: A list of products available, such as Sonicare, Toothpaste, and Whitening Gel.
- Add/Edit/Remove Products: Modify the list of products as needed.

Next Visit Options
- Customize Next Visit Options: Manage options for scheduling the patient's next visit.
- Next Visit Options List: A list of possible next visit options, such as "4-month Recall," "Braces Removal," and "Crown Delivery."
- Add/Edit/Remove Next Visit Options: Modify the list of next visit options as needed.

Notifications
- Set Notifications: Customize the location, duration, and type of notifications for alerts in the desktop app.
- Notification Location: Choose where notifications will appear on the screen (top right, top left, or bottom left).
- Notification Duration: Set how long notifications will stay on the screen (from 5 seconds to until dismissed).
- Audio Alerts: Select the default audio alert for team messages and enable audible notifications for operatory alerts.

Adding an Operatory Alert
1. Navigate to the Patient Flow Page:
- Open the Patient Flow page within the PbN desktop app.
2. Select the Operatory:
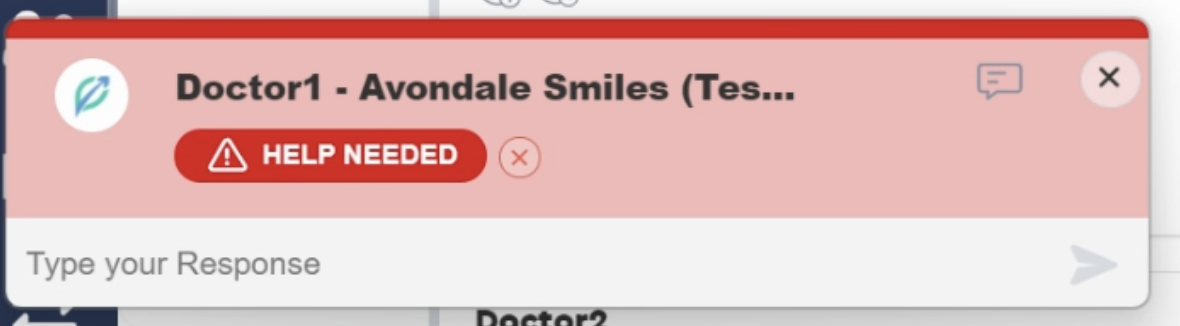
- Identify the operatory for which you need to add an alert. In the image, the operatory "Doctor1" has a "HELP NEEDED" alert.
- The operatory "Doctor1" has a red "HELP NEEDED" alert visible on the card. This indicates that assistance is required in this operatory.
3. Add an Alert:
- Click on the operatory card to open the alert options.
- Choose the appropriate alert type from the available options (e.g., "HELP NEEDED").
- Once selected, the alert will be displayed prominently on the operatory card.


Viewing Operatory Alerts in Team Messaging
Once an alert is added, the designated operatory will receive a notification, where communication can be sent. It will also be visible in the Team Messaging system. Here's what you can expect:
1. Open Team Messaging:
- Navigate to the Team Messaging section of the PbN desktop app.
2. View Active Alerts:
- The active alerts will be displayed in the messaging thread associated with the specific operatory. For instance, in the second image, the "HELP NEEDED" alert for "Doctor1" is shown at the top of the thread.
3. Details of Alerts:
- Each alert will include details such as the type of assistance needed and any specific messages related to it. The thread will show the history of alerts and team members' responses.
4. Responding to Alerts:
- Team members can respond to alerts directly within the messaging thread, allowing for real-time communication and quick issue resolution.

Attachments (12)


Was this article helpful?
That’s Great!
Thank you for your feedback
Sorry! We couldn't be helpful
Thank you for your feedback
Feedback sent
We appreciate your effort and will try to fix the article