To access the office schedule, select the Schedule button located at the bottom left corner of any page after logging in.

Navigating the Schedule
When you first open the schedule, it will display the current day's appointments. You can navigate to other dates by using the arrows on the left or by selecting a specific date.

Appointment Details
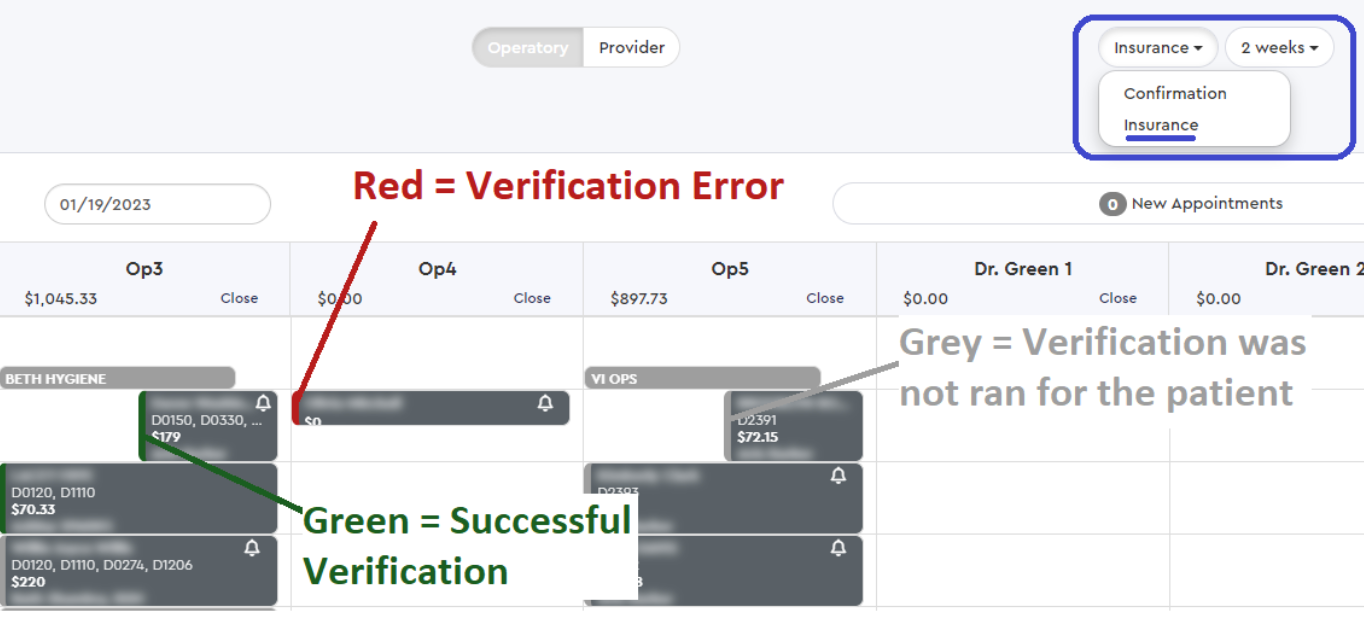
For each appointment, you can see:
- Confirmation status
- Estimated Gross Production for each appointment, column, and full-day
- Provider Name
- Service Codes
Some appointments may have a bell-shaped icon, indicating a Memo for the patient. This memo might include unscheduled treatment, an existing balance, or unscheduled family members.
Viewing More Information
Clicking on an appointment expands it to show more details. Clicking on the patient’s name within this window opens their complete information.
From this expanded view, you can:
- Confirm the appointment
- View appointment notes
- See the provider
- See the service codes
- View memo
- Access a communication log related to that appointment.


At the top of the schedule, you can select the Create Campaign button to start a Custom Campaign. This will automatically include anyone scheduled for that day. You will have the option to "fine-tune" the recipients before sending the message.

For more details, refer to our complete guide on sending out a custom campaign.
Additional Features on the Schedule Page
Closing the Day
- Close Day Button: The "Close Day" button allows you to close the day to prevent further bookings. This is useful for managing your appointment schedule effectively and ensuring no additional appointments are booked for the day.

Filters
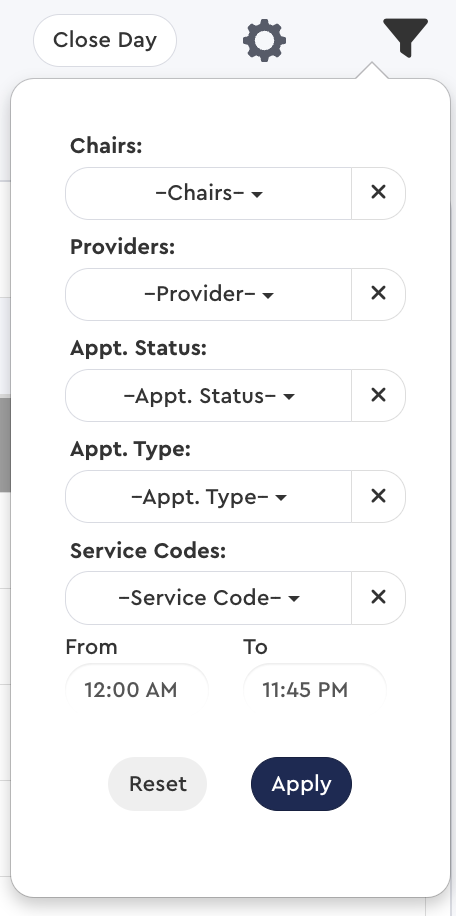
- Filter Icon: Use the filter icon to apply specific filters to your schedule. This can help you view appointments based on various criteria:
- Chairs: Select specific chairs to see the schedule for those chairs only.
- Providers: Choose specific providers to view their appointments.
- Appointment Status: Filter appointments by their status.
- Appointment Type: View specific types of appointments.
- Service Codes: Filter by specific service codes.
- Time Range: Set a time range to view appointments within that period.
- Click "Apply" to activate the selected filters or "Reset" to clear all filters.
Settings
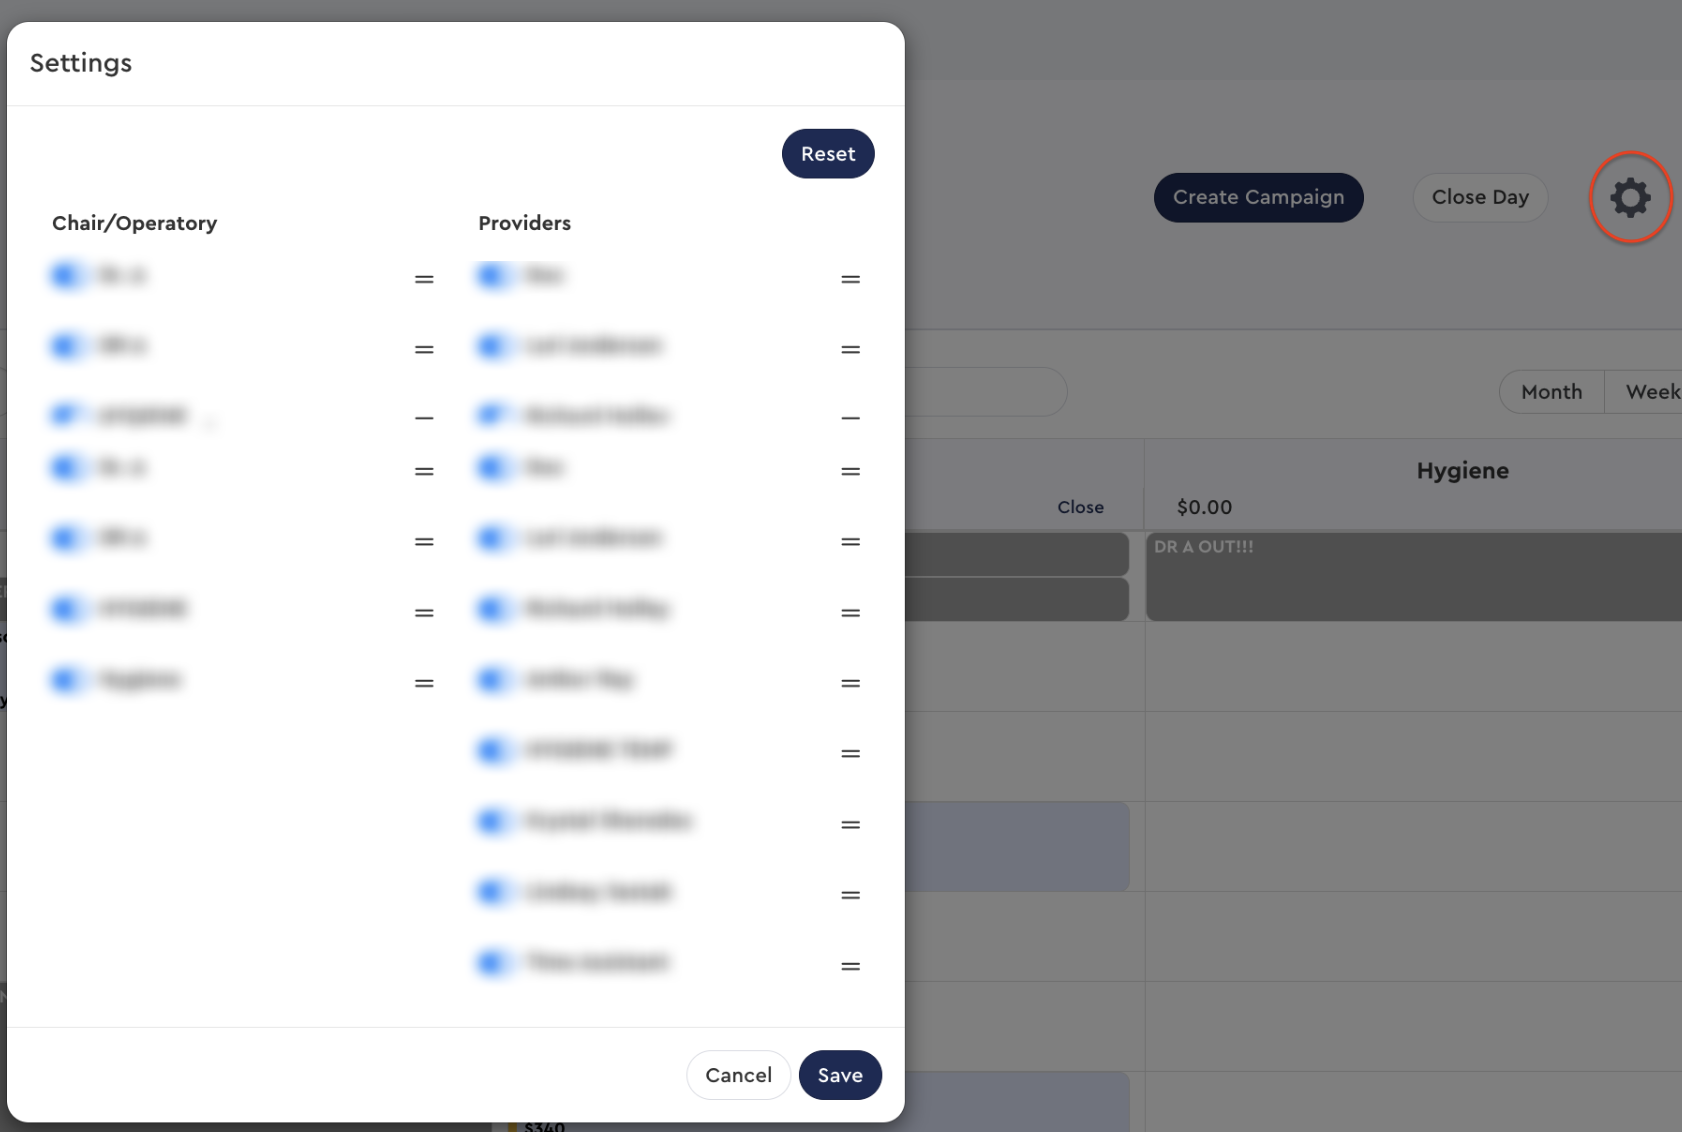
- Gear Icon: Click the gear icon to access additional settings. Here, you can choose the providers and chairs that are active on the schedule. This customization helps tailor the schedule view to your specific needs and preferences.
Managing Online Bookings
- Pending Appointments: If your practice has online booking active, you have the option to review, accept, or decline pending appointments. This feature ensures that you have control over appointments booked online, allowing you to manage your schedule efficiently.


Was this article helpful?
That’s Great!
Thank you for your feedback
Sorry! We couldn't be helpful
Thank you for your feedback
Feedback sent
We appreciate your effort and will try to fix the article